
Step 1
Throttle Limit
 Click to enlarge
For some copters that do never use the full throttle range (e.g. you never use more than 60% of throttle) it might be helpful to set a throttle limit.
For most pilots/drones this is NOT necessary/recommended, feel free to skip.
To set a throttle limit, you should first figure out (roughly) how much throttle (in percent) you use at maximum.
You can either do this by guessing or by doing a flight with your blackbox enabled and loading that flight into the analyzer of this step. The analyzer will show you the used amount of throttle, so you can visually see how much throttle you used at what time of the flight and determine your max throttle based upon this data.
We recommend that you do not set your throttle limit exactly to the maximum used throttle but instead a little bit higher, this way you have some power left for when you maybe need it.
After you figured out your throttle limit, its as easy as
connecting your drone to the Betaflight Configurator
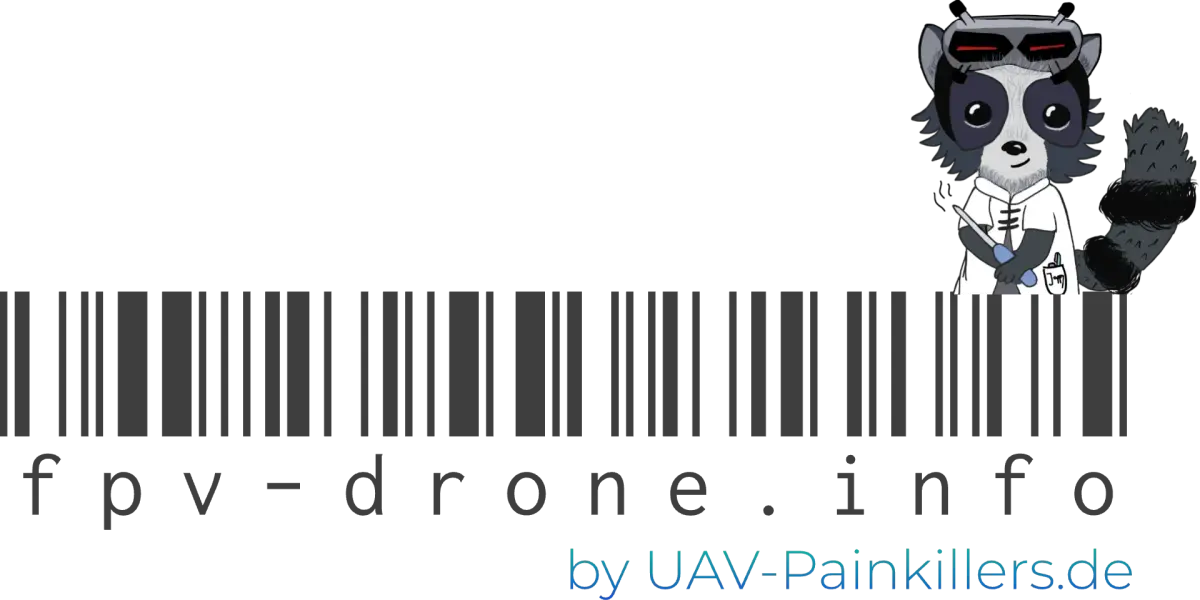
Open the "PID Tuning Tab" (#1)
inside the PID Tuning Tab, you need to go to the "Rateprofile Settings" Tab (#2)
Set the Throttle Limit Type (#3) to "SCALE"
Set the Throttle Limit Value (#4) to your desired limit in percent
hit save
After you are done with this step, you should do a test flight and confirm that you like the new settings, if not revert them or tweak them until you like them.
In order to use the Tuning Tools Analyzer, you need to download and cache the actual analyzer. The files are about 150 MB in size, if you are currently on a limited data plan, please be aware of this.
Step 2
Throttle Expo
 Click to enlarge
Ever realized that a lot of the time you don't actually use the top and bottom part of your throttle as much but mostly use some range of it mostly? This is normal.
Because of this, it might be helpful to set/tune your so called throttle "expo" and throttle "mid".
What are these?
Usually the movement of your throttle stick is mapped 1:1 to the actually applied throttle value.
When we apply "expo" this gets changed a little bit.
Instead of a perfect linear mapping we now get a curved lined where the center area of your stick position does not change the throttle as much but the top and bottom parts change it more.
This increase the resolution/control that you have in the most used throttle range which can lead to a better control and more stable flying.
Throttle Mid goes hand in hand with this.
A lot of the times you most used throttle value is actually not exactly 50% of your throttle.
With throttle mid you can tell Betaflight where exactly your main throttle usage is and it will move the applied expo curve to be around that point.
To set a throttle expo and mid, you should first figure out (roughly) what your most used throttle (in percent) is.
You can either do this by guessing or by doing a flight with your blackbox enabled and loading that flight into the analyzer of this step. The analyzer will show you the used amount of throttle, so you can visually see how much throttle you used at what time of the flight and determine your most used throttle value based upon this data.
After you figured this out, its as easy as
connecting your drone to the Betaflight Configurator
Open the "PID Tuning Tab" (#1)
inside the PID Tuning Tab, you need to go to the "Rateprofile Settings" Tab (#2)
Set the Throttle Mid (#6) to your most used throttle value
Set the Throttle Expo (#5) to your desired amount of expo (if you are unsure, start with 0.3 and increase/lower it until you like the flying experience
hit save
After you are done with this step, you should do a test flight and confirm that you like the new settings, if not revert them or tweak them until you like them.
In order to use the Tuning Tools Analyzer, you need to download and cache the actual analyzer. The files are about 150 MB in size, if you are currently on a limited data plan, please be aware of this.
Step 3
RC Smoothing
 Click to enlarge
RC Smoothing removes jitter and noise from your radio controller and sticks (e.g. tiny vibrations, etc.) which would otherwise be sent to your drone and make it vibrate/jitter.
To enable RC Smoothing,
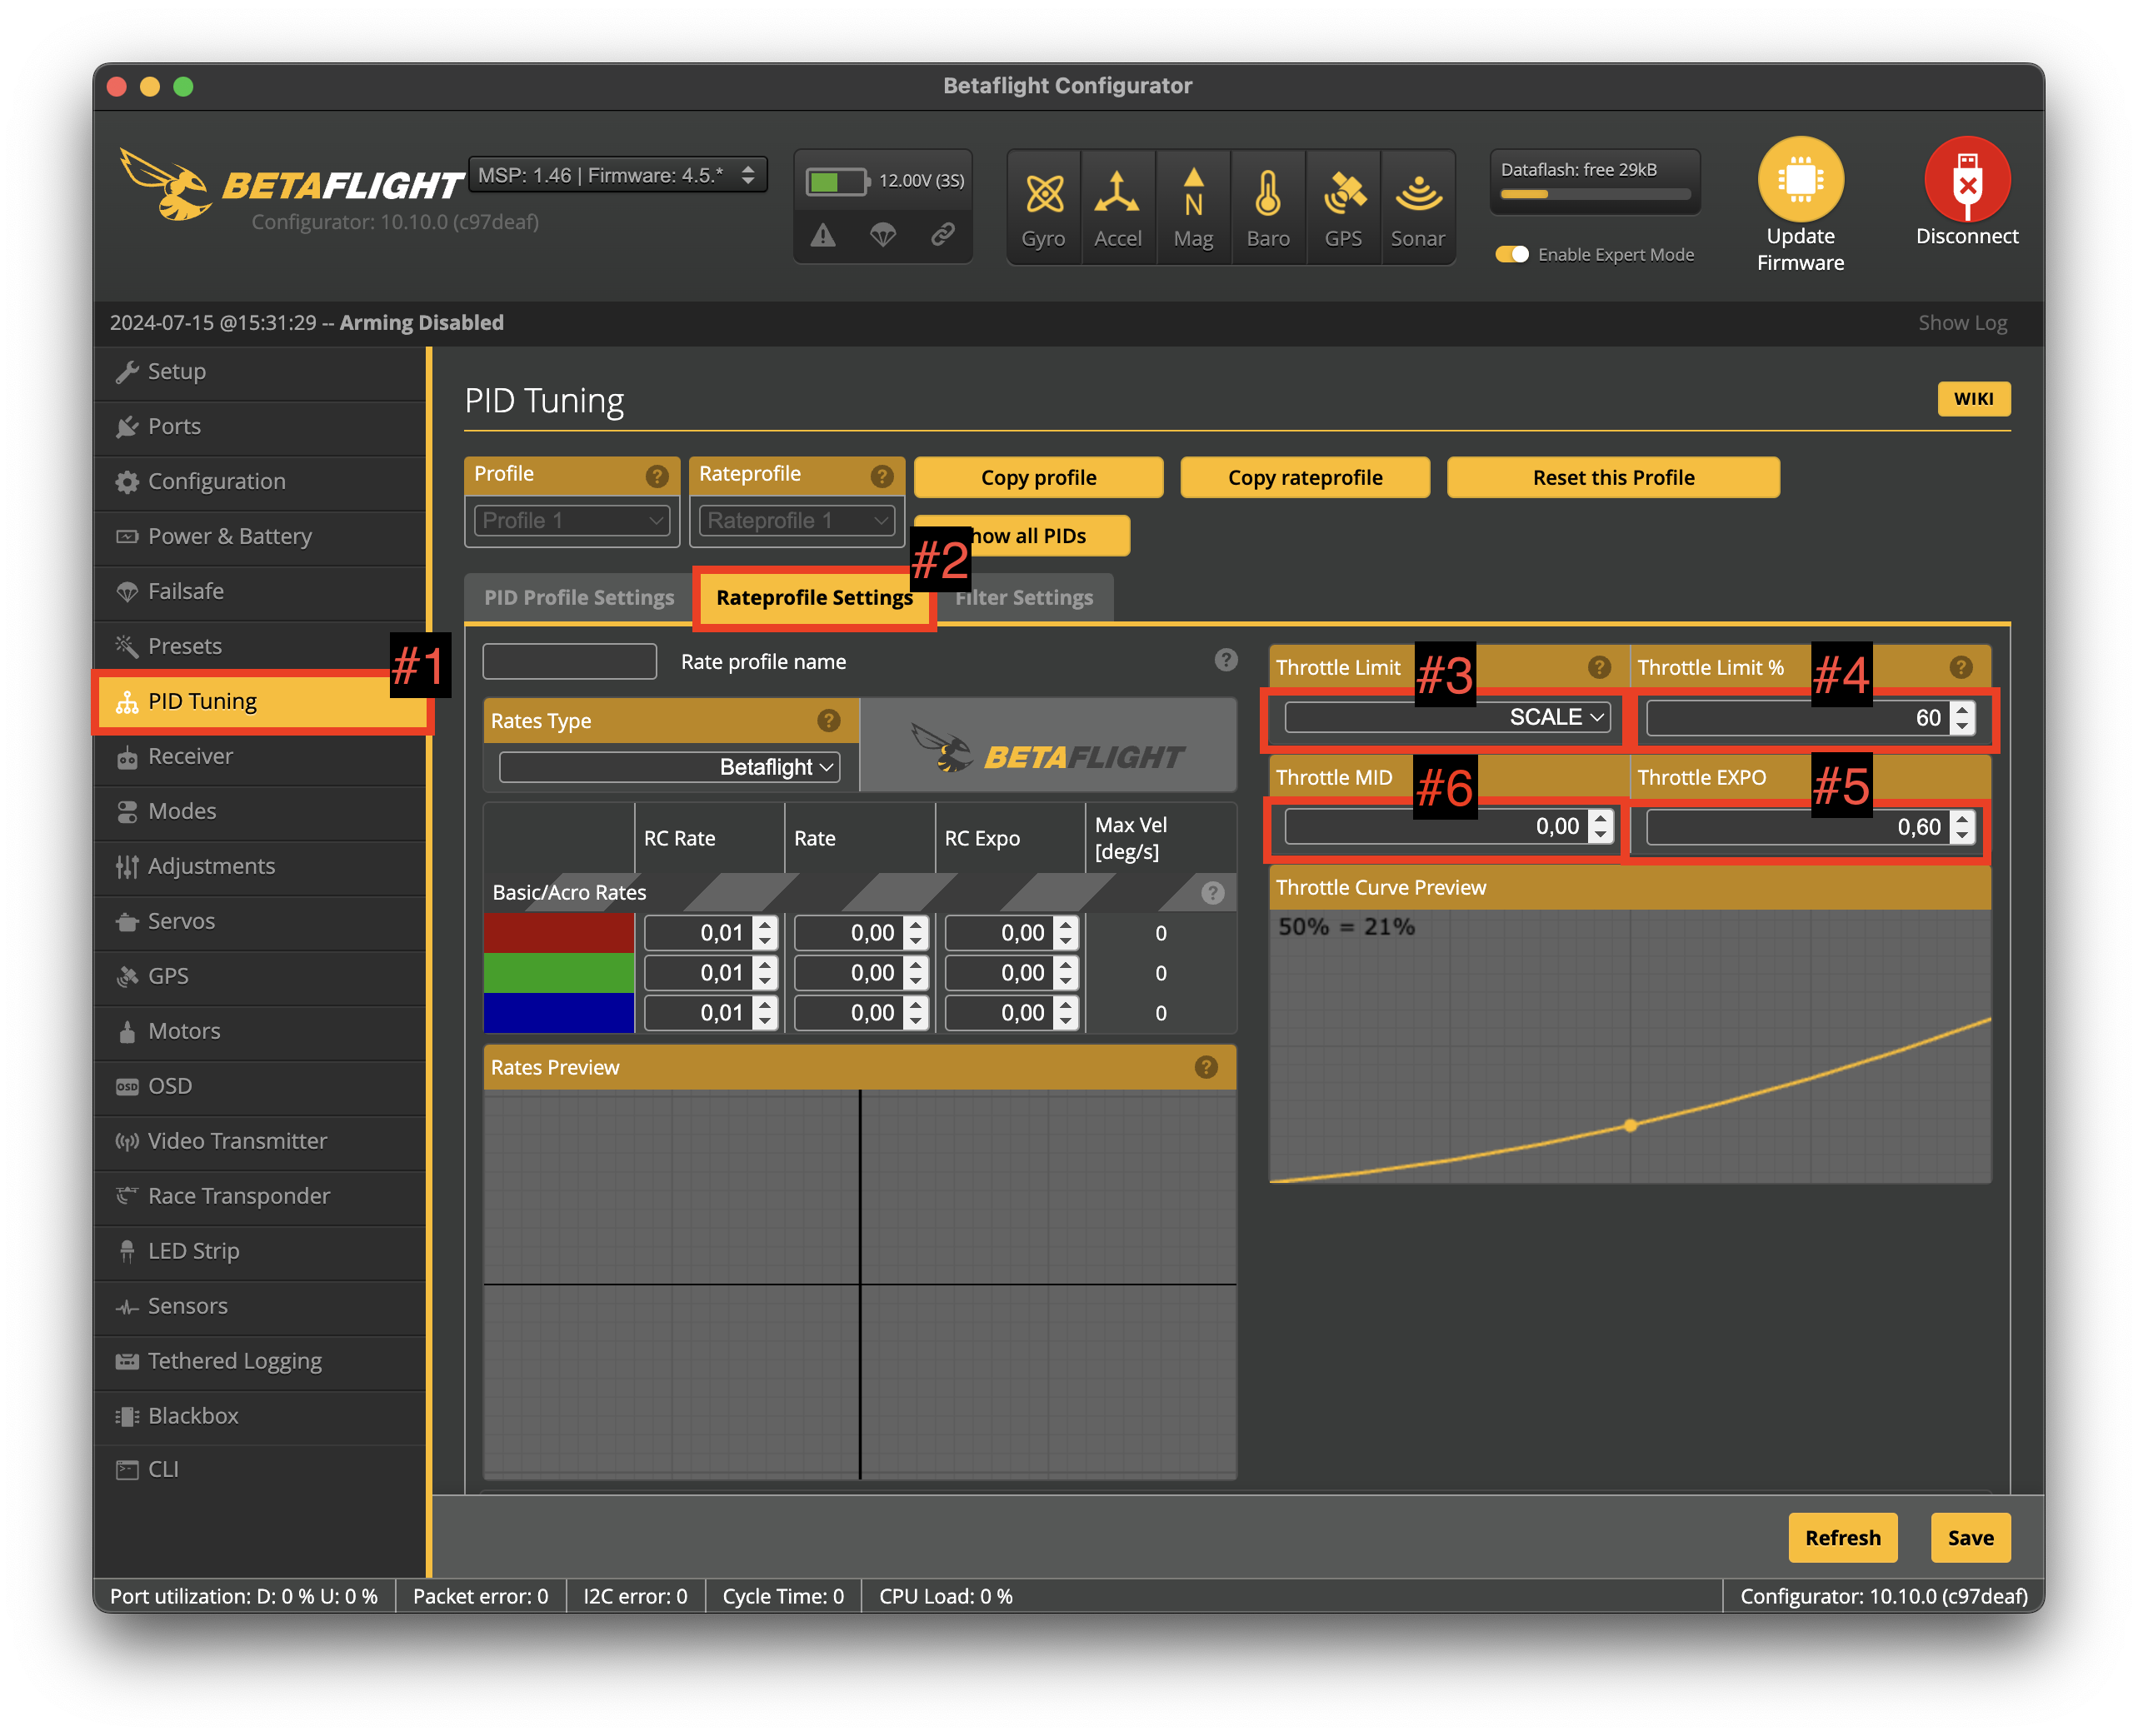
open the "Receiver" Tab (#1)
Set "Smoothing Mode" (#2) to "On"
Set "Setpoint Cutoff Type" (#3) to "Auto"
Set "Feedforward Cutoff Type" (#4) to "Auto"
Set your desired "Auto Factor" (#5) (see below for instructions on how to determine this)
hit save
The default RC Smoothing Auto Factor is targeted at Racing Pilots.
If you are a racer, leave it at 30 (at least to start with, feel free to play around with the value to find the one that feels best to you)
If you fly freestyle, set it between 50 to 60.
If you fly cinematic, set it to 90 or higher.
As always: Test out some different values and fly with them until you find the one that feels right to you there is no golden standard that applies to everyone, each pilot has their own preferences in rates.
Step 4
Rates
 Click to enlarge
What are rates?
Rates determine speed with which your drone does flips and rolls etc. as well as how your stick movements are mapped to the speed of these movements.
If you set your rates very low, your drone will turn very slow even with full stick movements, and if you do the opposite the drone will be able to do a whole role in a split second even though you barely touched your sticks.
In this guide we will be using "Actual" Rates, we will not discuss or explain what the difference between different types of rates in Betaflight are, if you are curious feel free to have a read at the Betaflight.com documentation as a starting point.
There is one set of settings per axis of your drone (Yaw, Pitch, Roll).
Each of these consists of 3 values which are
Center Sensitivity
Max Rate
Expo
Center sensitivity
determines how sensitive your drone should be at the center point of your sticks.
The lower you set these, the more precise control you will have. But this also means you need more stick movement to perform faster movements.
We recommend the following center sensitivity values as a starting point:
Proximity Flying, Cinematic: 50
Freestyle: 100
Racing, Line of Sight, Dynamic Flying: 150
Max Rate
The max rate value determines the maximum speed the drone can move at (per axis).
This is essentially the speed your drone will have when you put your stick at the maximum position.
The higher this value is, the quicker/snappier the drone will move, but this also reduces the amount of precision you will have in your movements.
We recommend the following values as a starting point:
Racing and Cinematic: 500
Freestyle: 700
Snappy Style: 1100
Expo
This has the same effect as the expo value we configured beforehand for your throttle.
How do you set all these values?
Connect your drone to the Betaflight Configurator
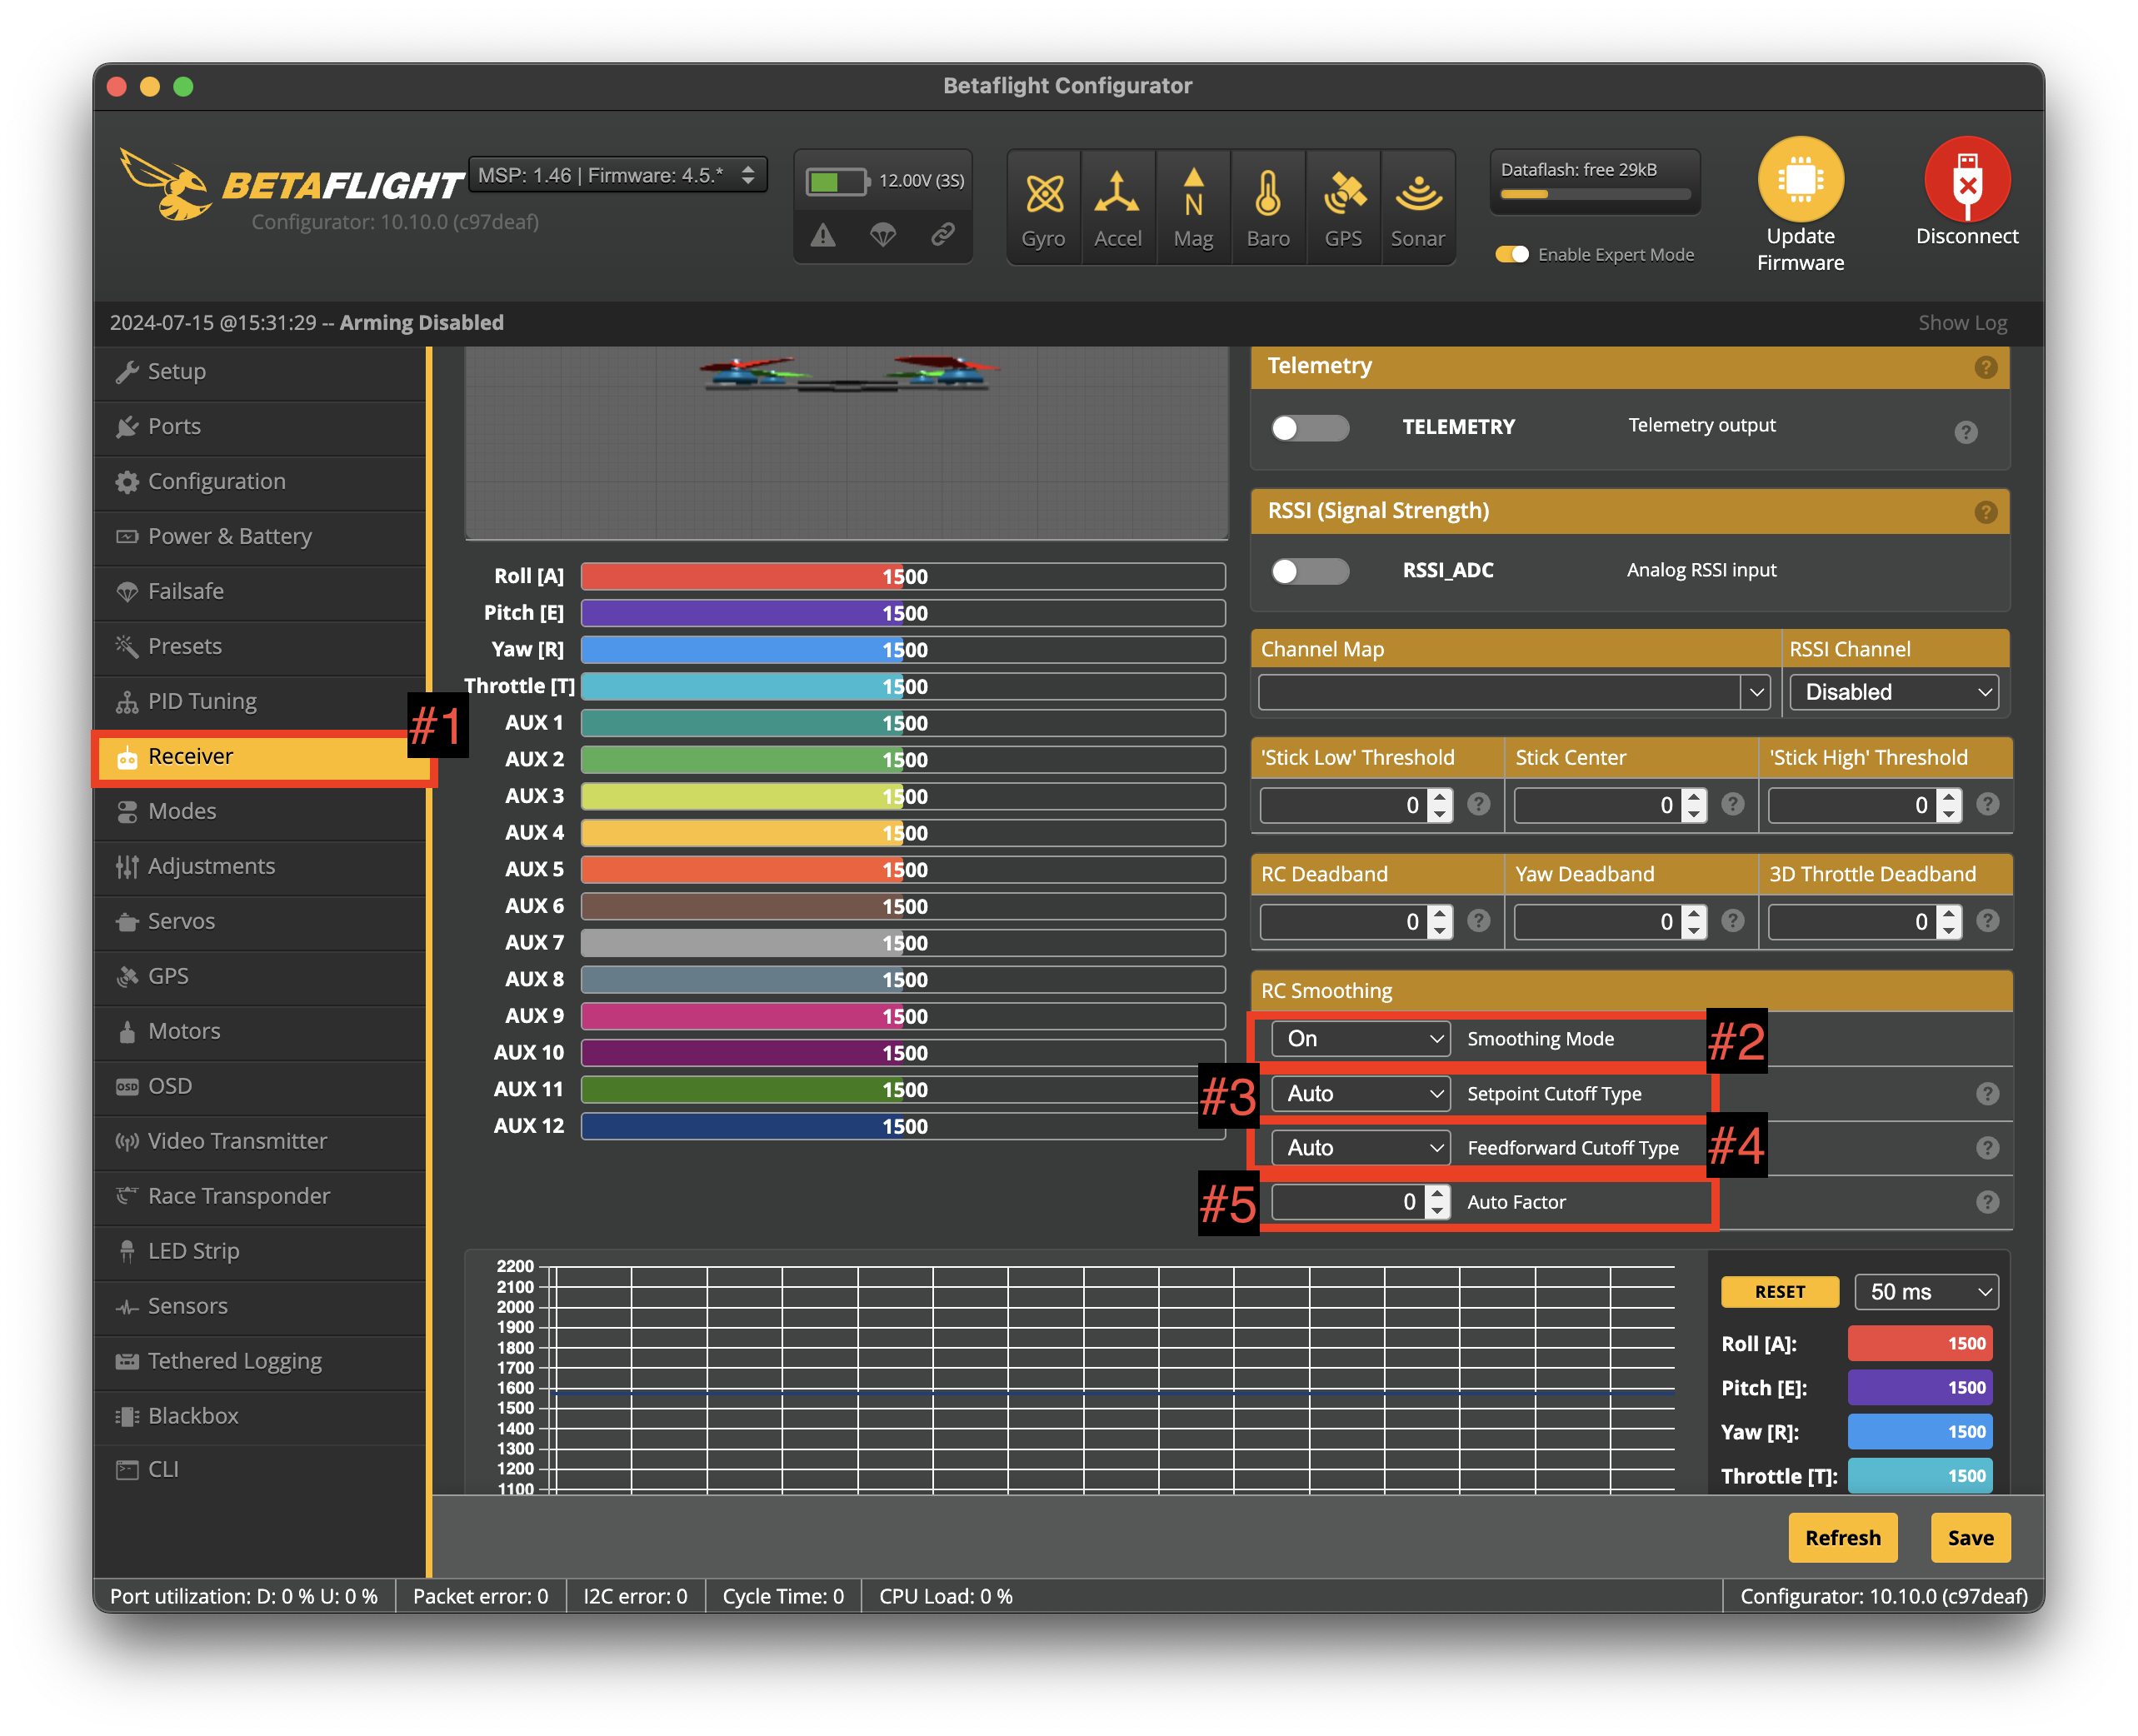
Open the "PID Tuning" Tab (#1)
Inside the PID Tuning Tab, open the "Rateprofile Settings" Tab (#2)
Set the "Rates Type" to "Actual (#3)
Set your desired Center Sensitivity (#4), Max Rate (#5) and Expo (#6) for each Axis
hit save
As always: Try out different values and find the ones that match your flying style.