
Setup
 Click to enlarge
Step 1
Gyro Filters
 Click to enlarge
Let's start of by configuring the basics.
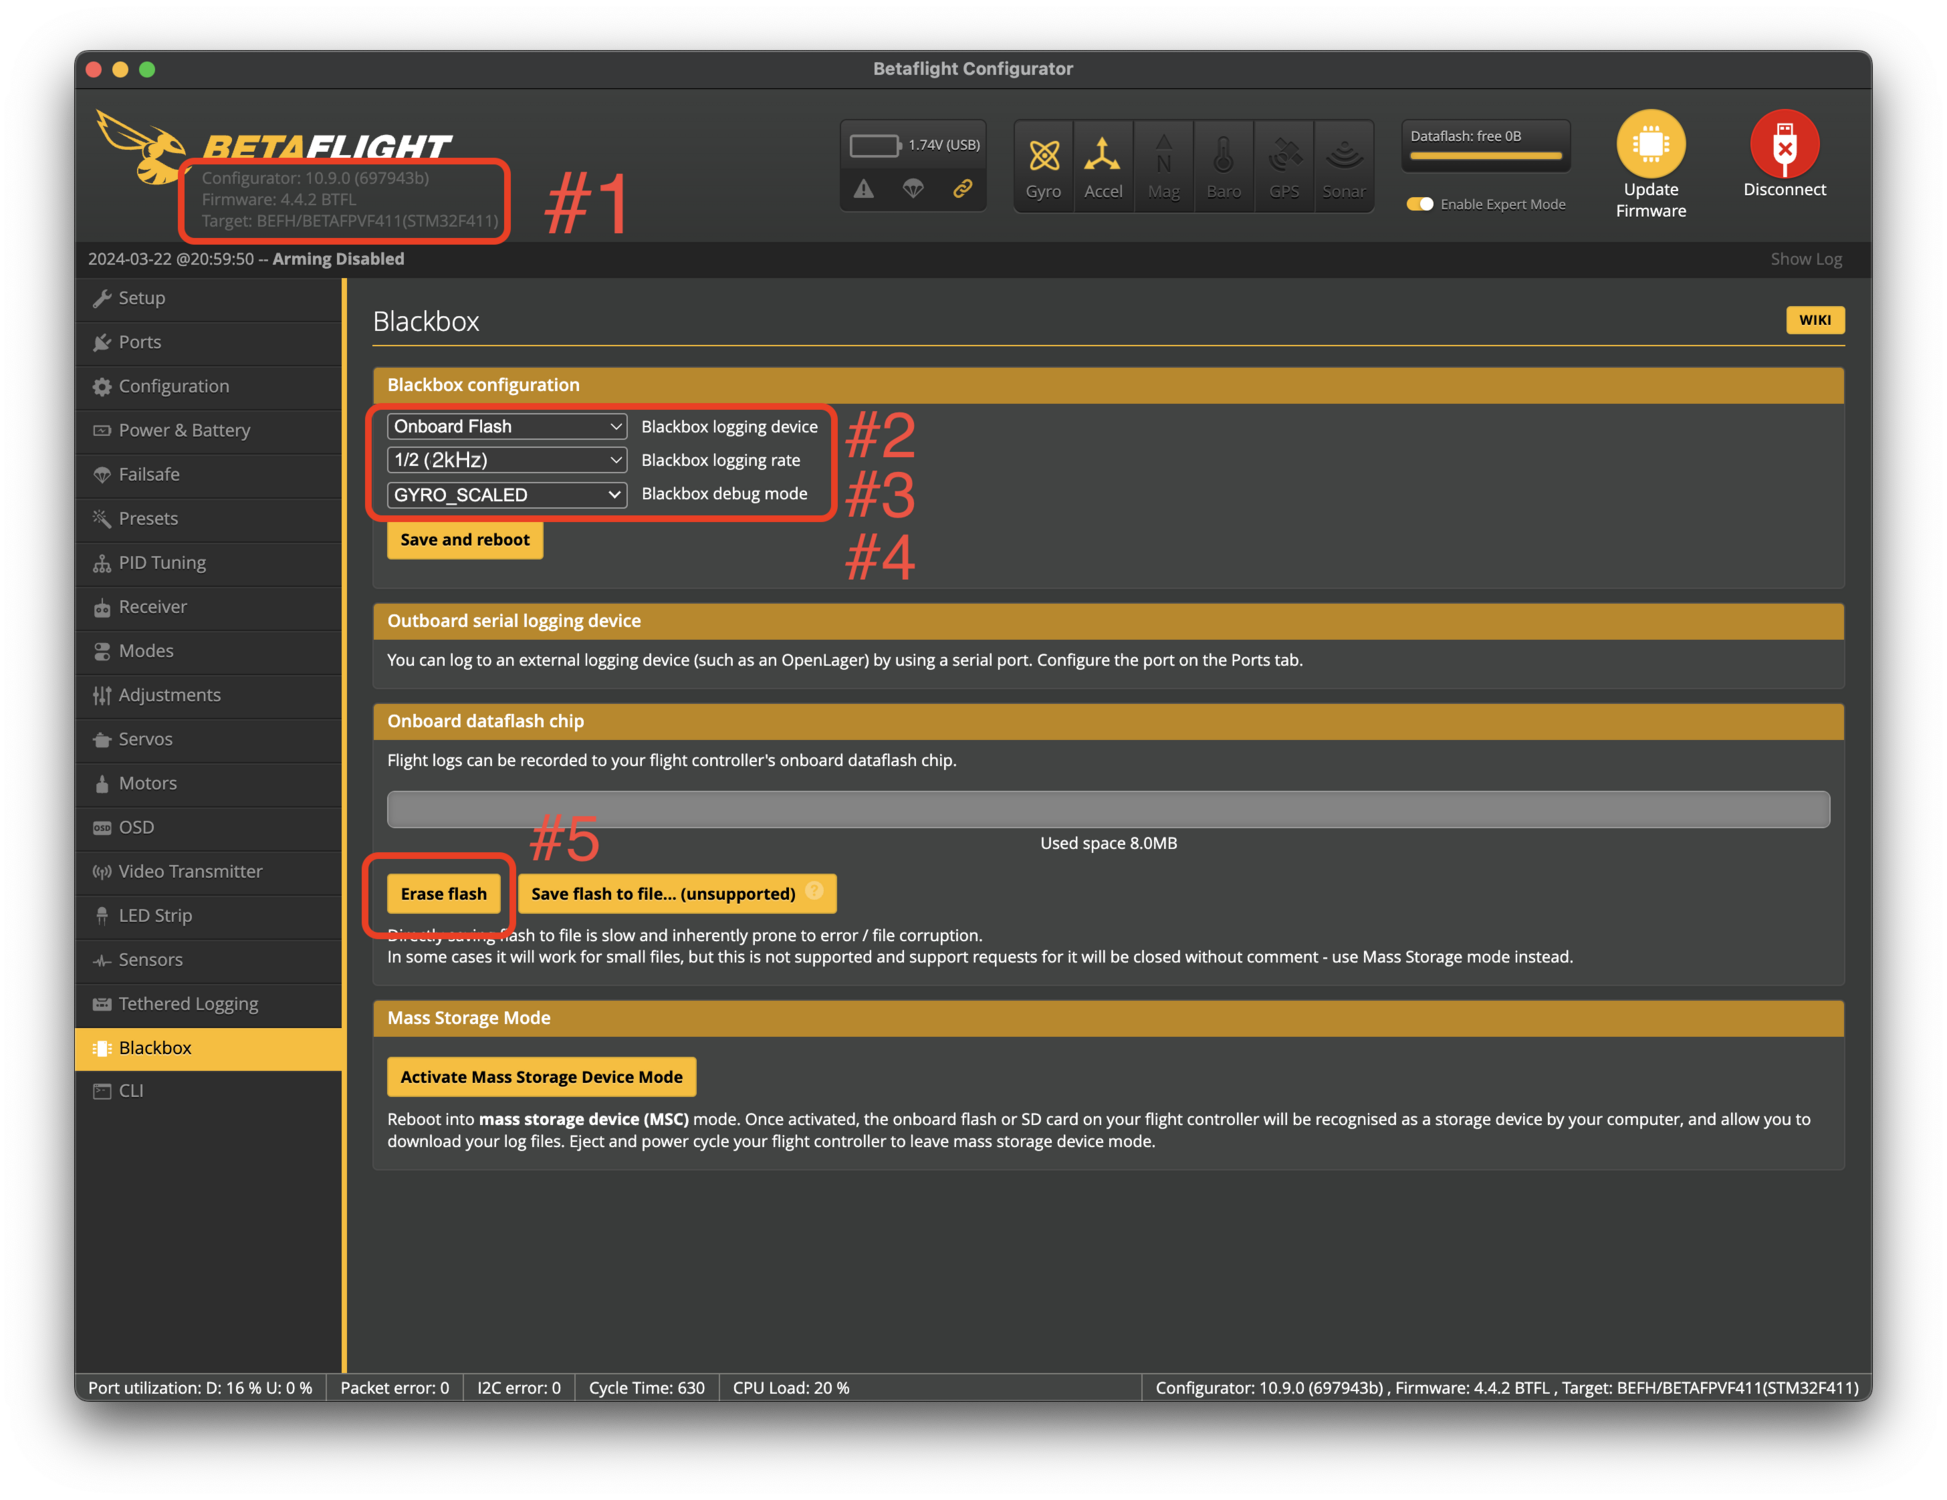
Connect your drone to Betaflight and navigate to the "PID Tuning" tab.
In the "PID Tuning" tab (#1), you will see a tab bar with three items, open on the "Filter Settings" tab (#2).
Now apply the following
Disable "Gyro Lowpass 1" (#3)
If your "Gyro update frequency" is the same as your "PID loop frequency" (You can find these in the "Configuration" tab), disable "Gyro Lowpass 2" (#4) as well
If your "Gyro update frequency" is NOT the same as your "PID loop frequency", move the "Gyro Filter Multiplier" Slider (#5) to the maximum of 2.0
If you are unsure about what to do, take a look at the attached picture which highlights where you can find all of the input fields / information.
Step 2
Flying
Now it's time to do some flying to get one or more good blackbox logs for the upcoming filter tunings.
No need to do anything crazy,
Fly for 20 seconds to one minute, do some rolls, flips, and throttle punches.
You should definitely fly at all available throttle ranges (throttle punch up to the maximum or just fast flying forwards with increasing throttle up to maximum)
Feel free to do multiple flights, this way you can compare logs in case one contains more or less noise than the other.
Step 3
Extract Logfile
 Click to enlarge
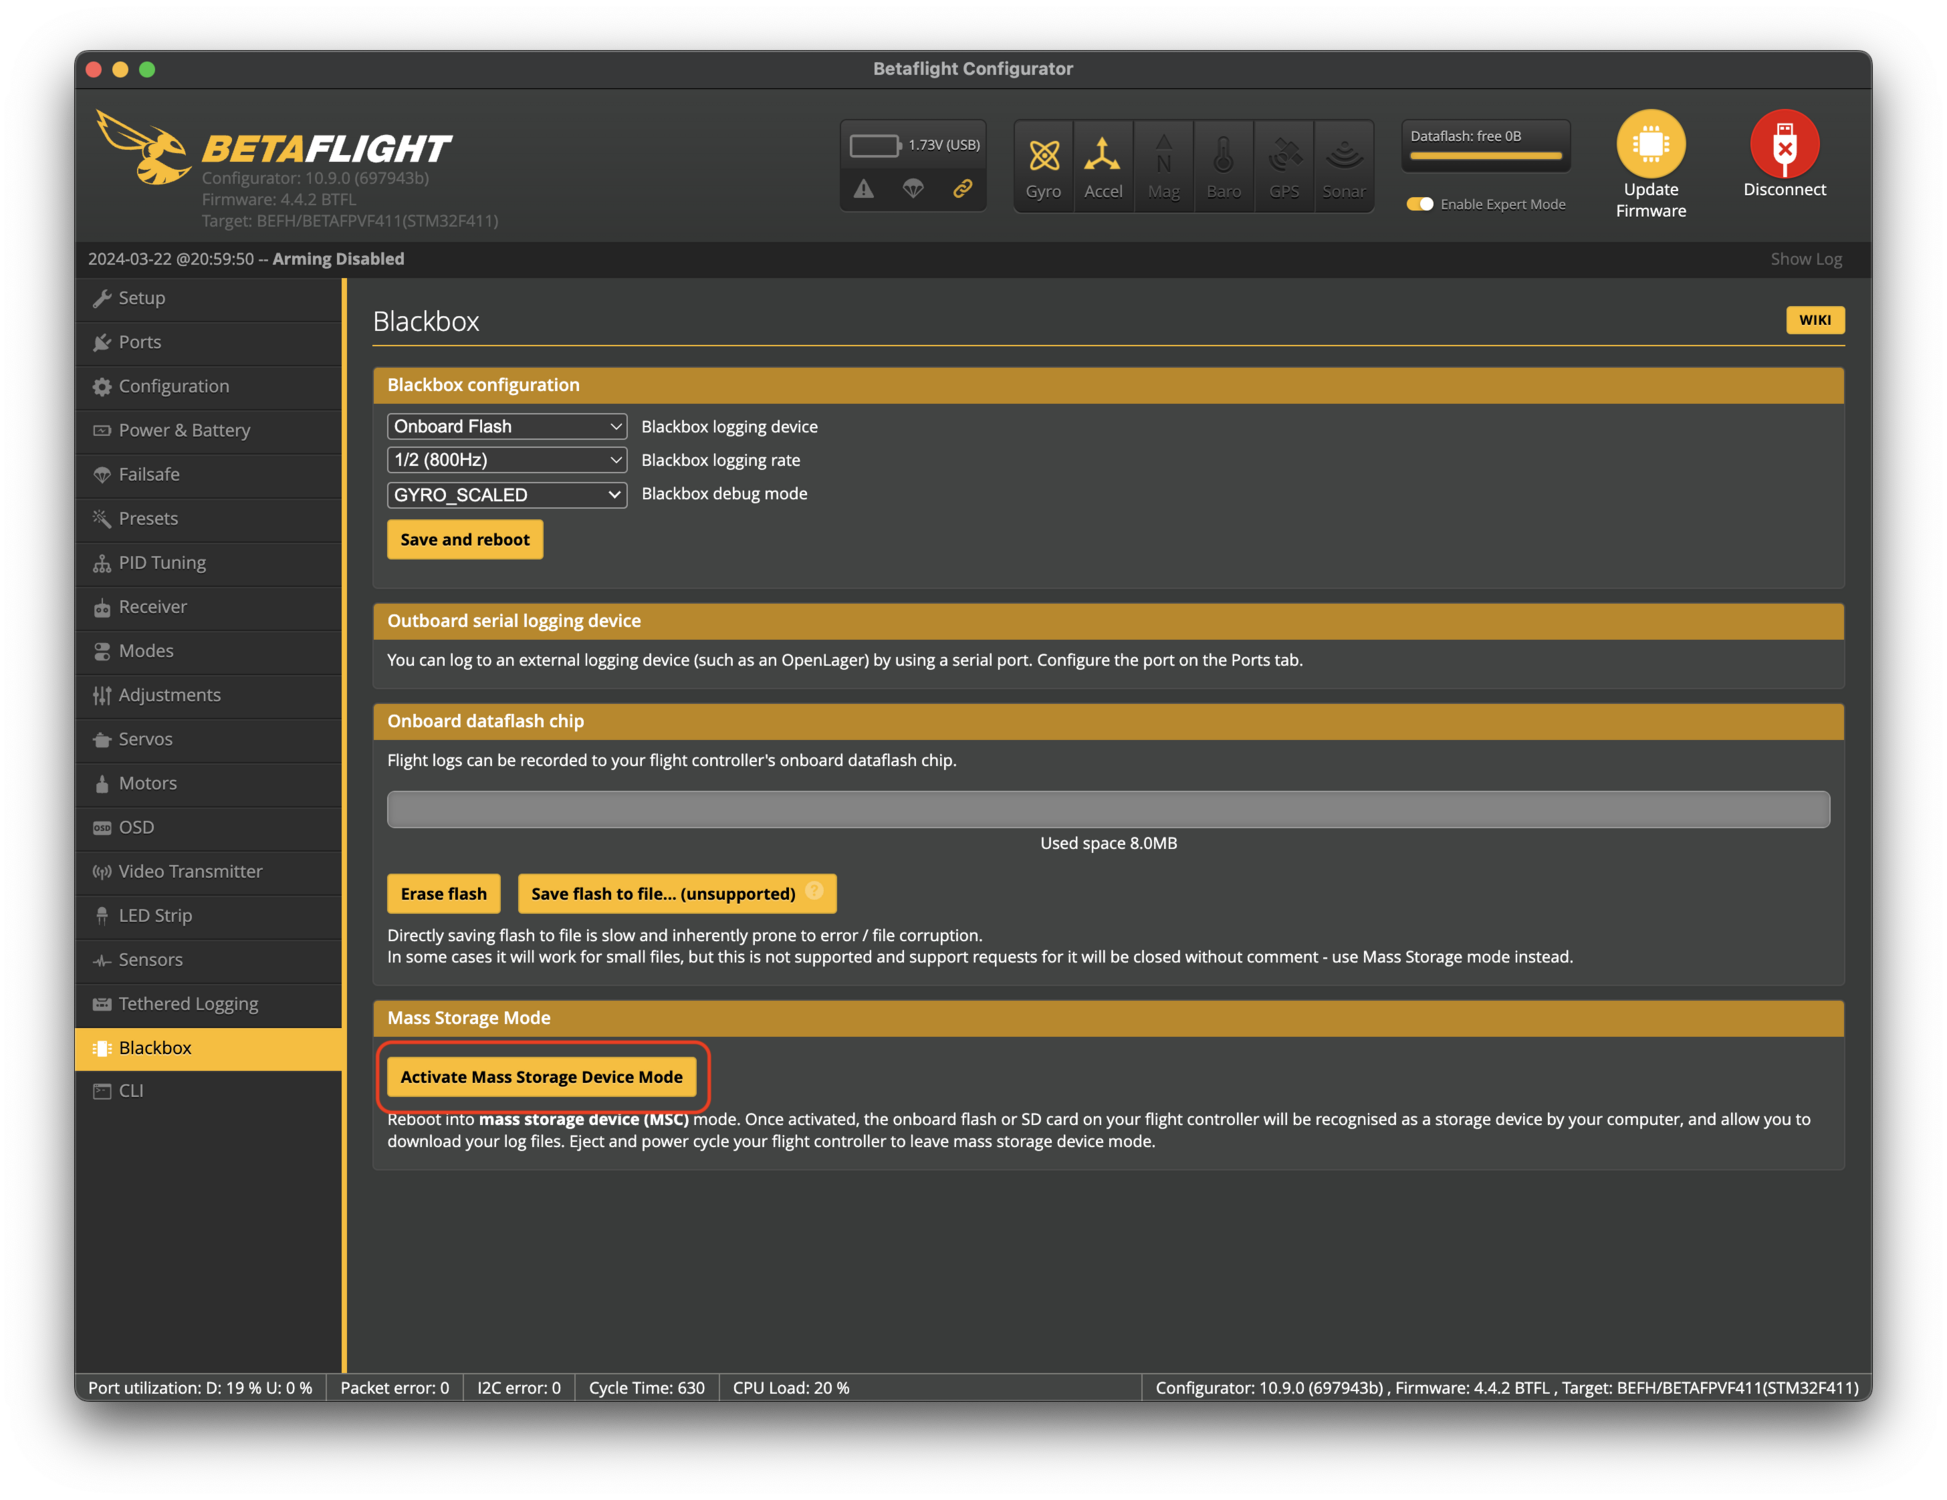
For the next step we will need access to the generated log file.
Connect your drone to the betaflight configurator, open the "Blackbox" tab and click on "Activate Mass Storage Device Mode".
A new USB storage device will connect / appear on your computer (like a USB stick)
Open that device on your computer (like a USB stick) and find a file called "btfl_all.bbl"
Copy this to your computer.
Step 4.1
RPM Filters - Analysis
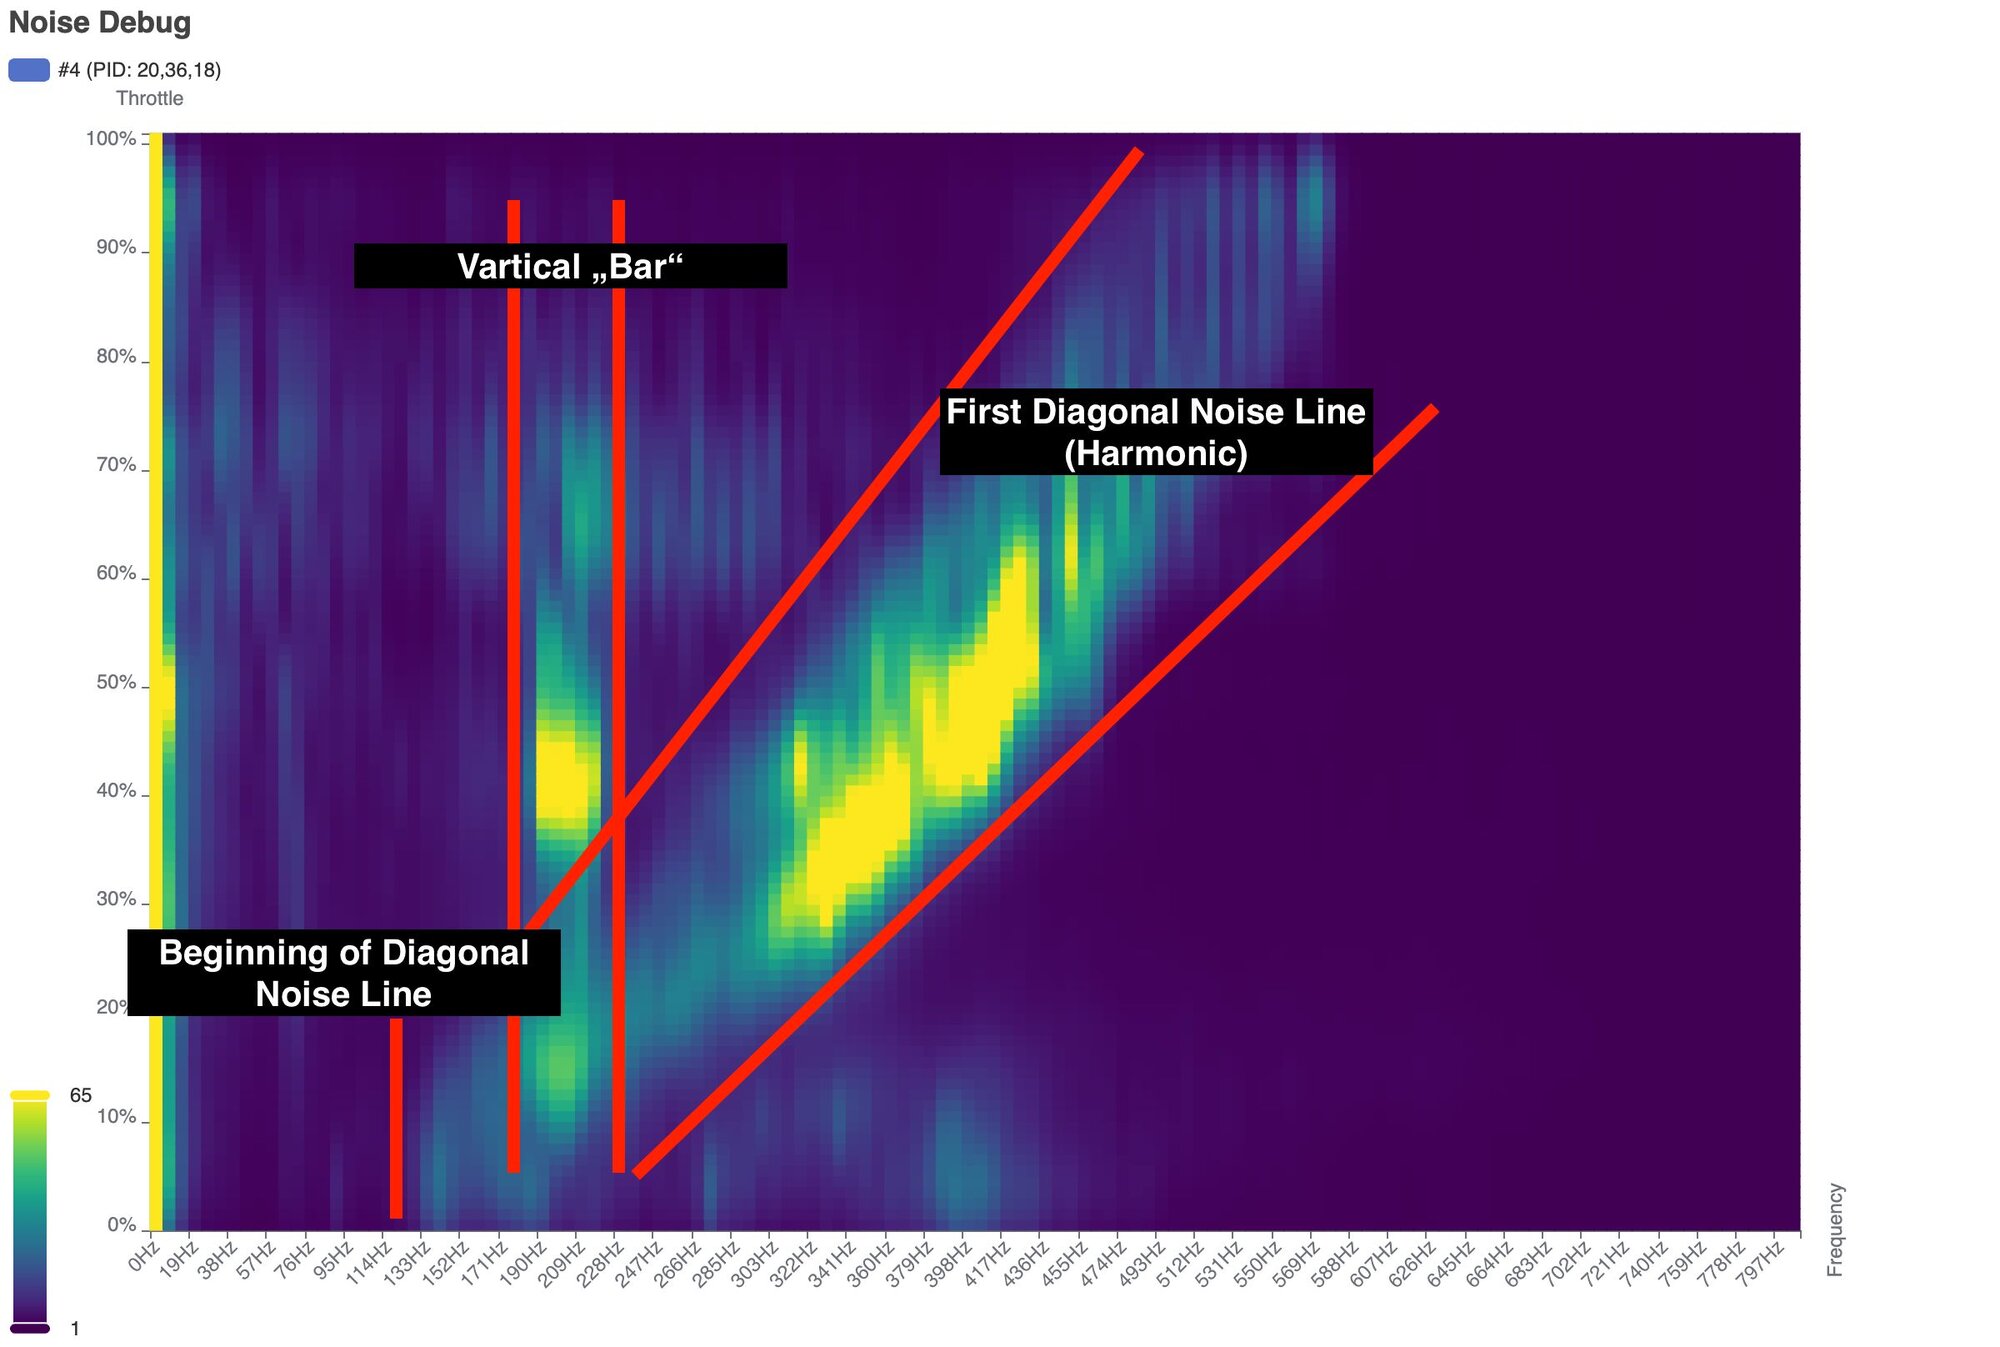 Click to enlarge
Now it's getting interesting, let's do our first analysis.
Your job is pretty easy:
Upload your saved logfile (btfl_all.bbl) into the analyzer below
Count the Diagonal "lines" (harmonics) in your plot (see attached picture for reference) and remember that number (or write it down somewhere)
Now you need to find the lowest frequency at which any of these lines start (the most left point of any of these lines) and also remeber that one / write it down
In order to use the Tuning Tools Analyzer, you need to download and cache the actual analyzer. The files are about 150 MB in size, if you are currently on a limited data plan, please be aware of this.
Step 4.2
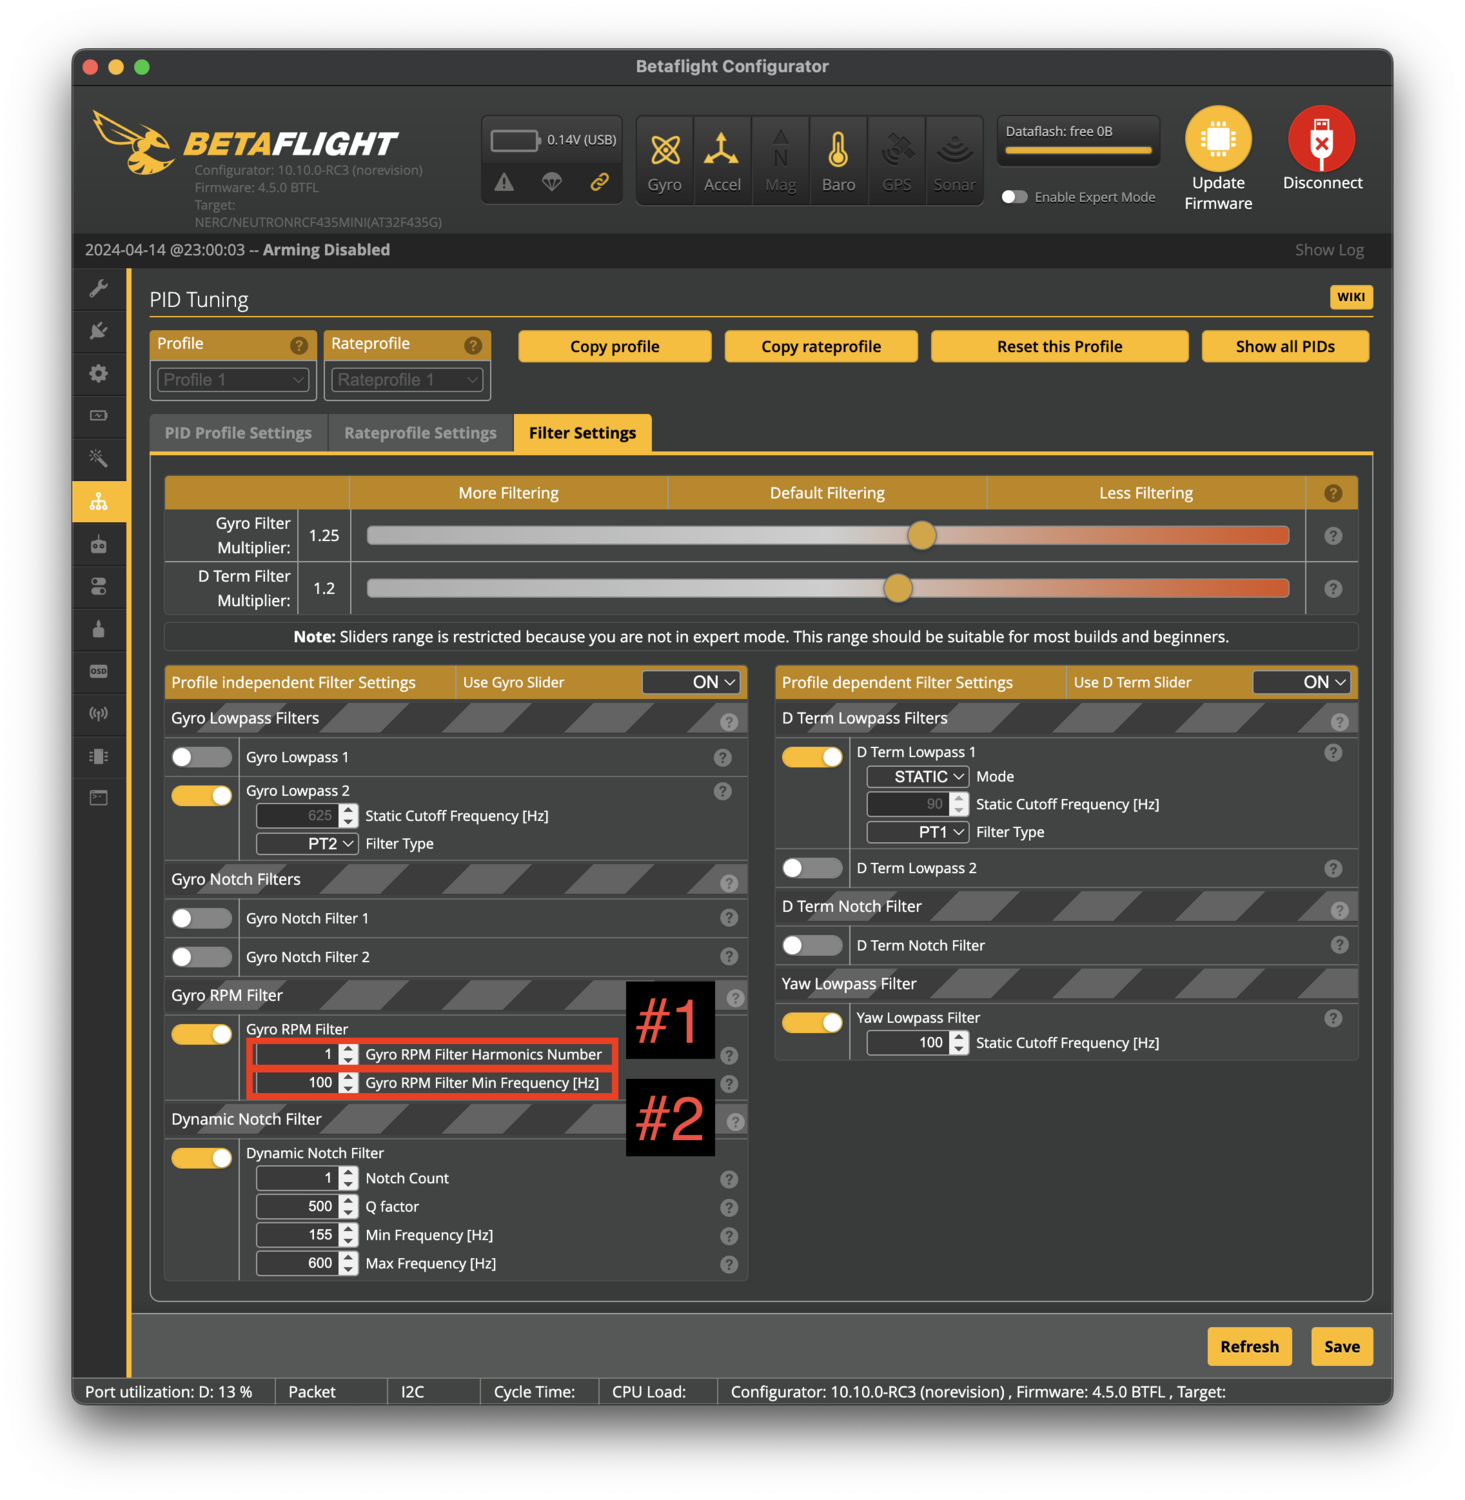
RPM Filters - Config
 Click to enlarge
Now you just need to put these numbers into the correct fields in Betaflight.
Connect your drone to Betaflight again and navigate back to the "PID Tuning" tabs "Filter Settings" section.
Set the "Gyro RPM Filter Harmonics Number" (#1) to the amount of lines you counted.
Set the "Gyro RPM Filter Min Frequency (Hz)" (#2) to the lowest frequency that you have written down before.
If you have troubles finding these inputs, take a look at the attached image.
Step 5
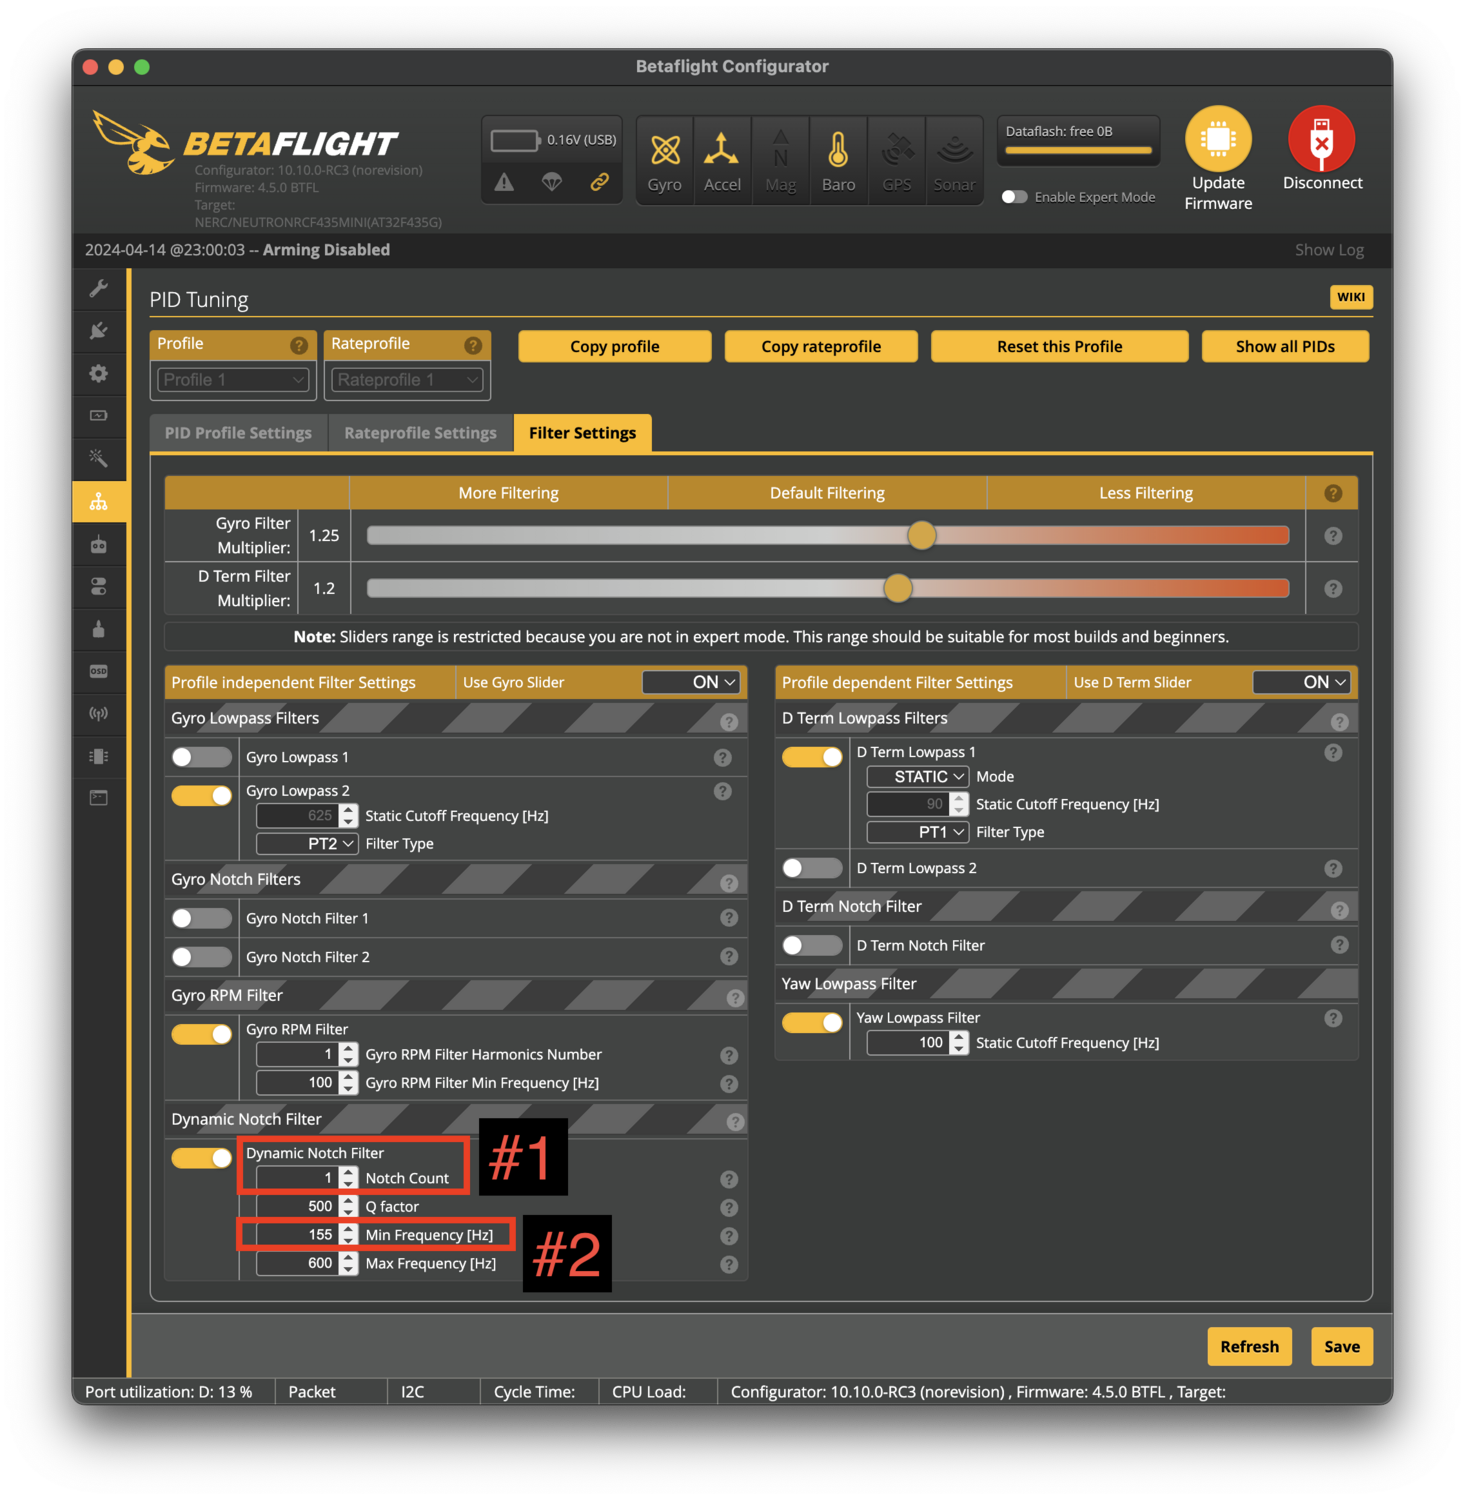
Dynamic Notch Filter
 Click to enlarge
Let's take a look at the Dynamic Notch filter.
We can take the previous plot / analysis for this.
Find the amount of vertical bars in the plot (see attached picture to see what i mean) and set it as the "Dynamic Notch Count" (#1)
In some cases it might be that there are no vertical bars at all, if this is the case for your drone: Just turn off the Dynamic Notch Filter.
You also need to determine the beginning and end of the notch filter area.
Set the "Dynamic Notch Min Frequency Hz" (#2) to the frequency at which the first bar begins and subtract ~25Hz.
Leave the "Dynamic Notch Max Hz" at the default value, its fine as it is.
Step 6
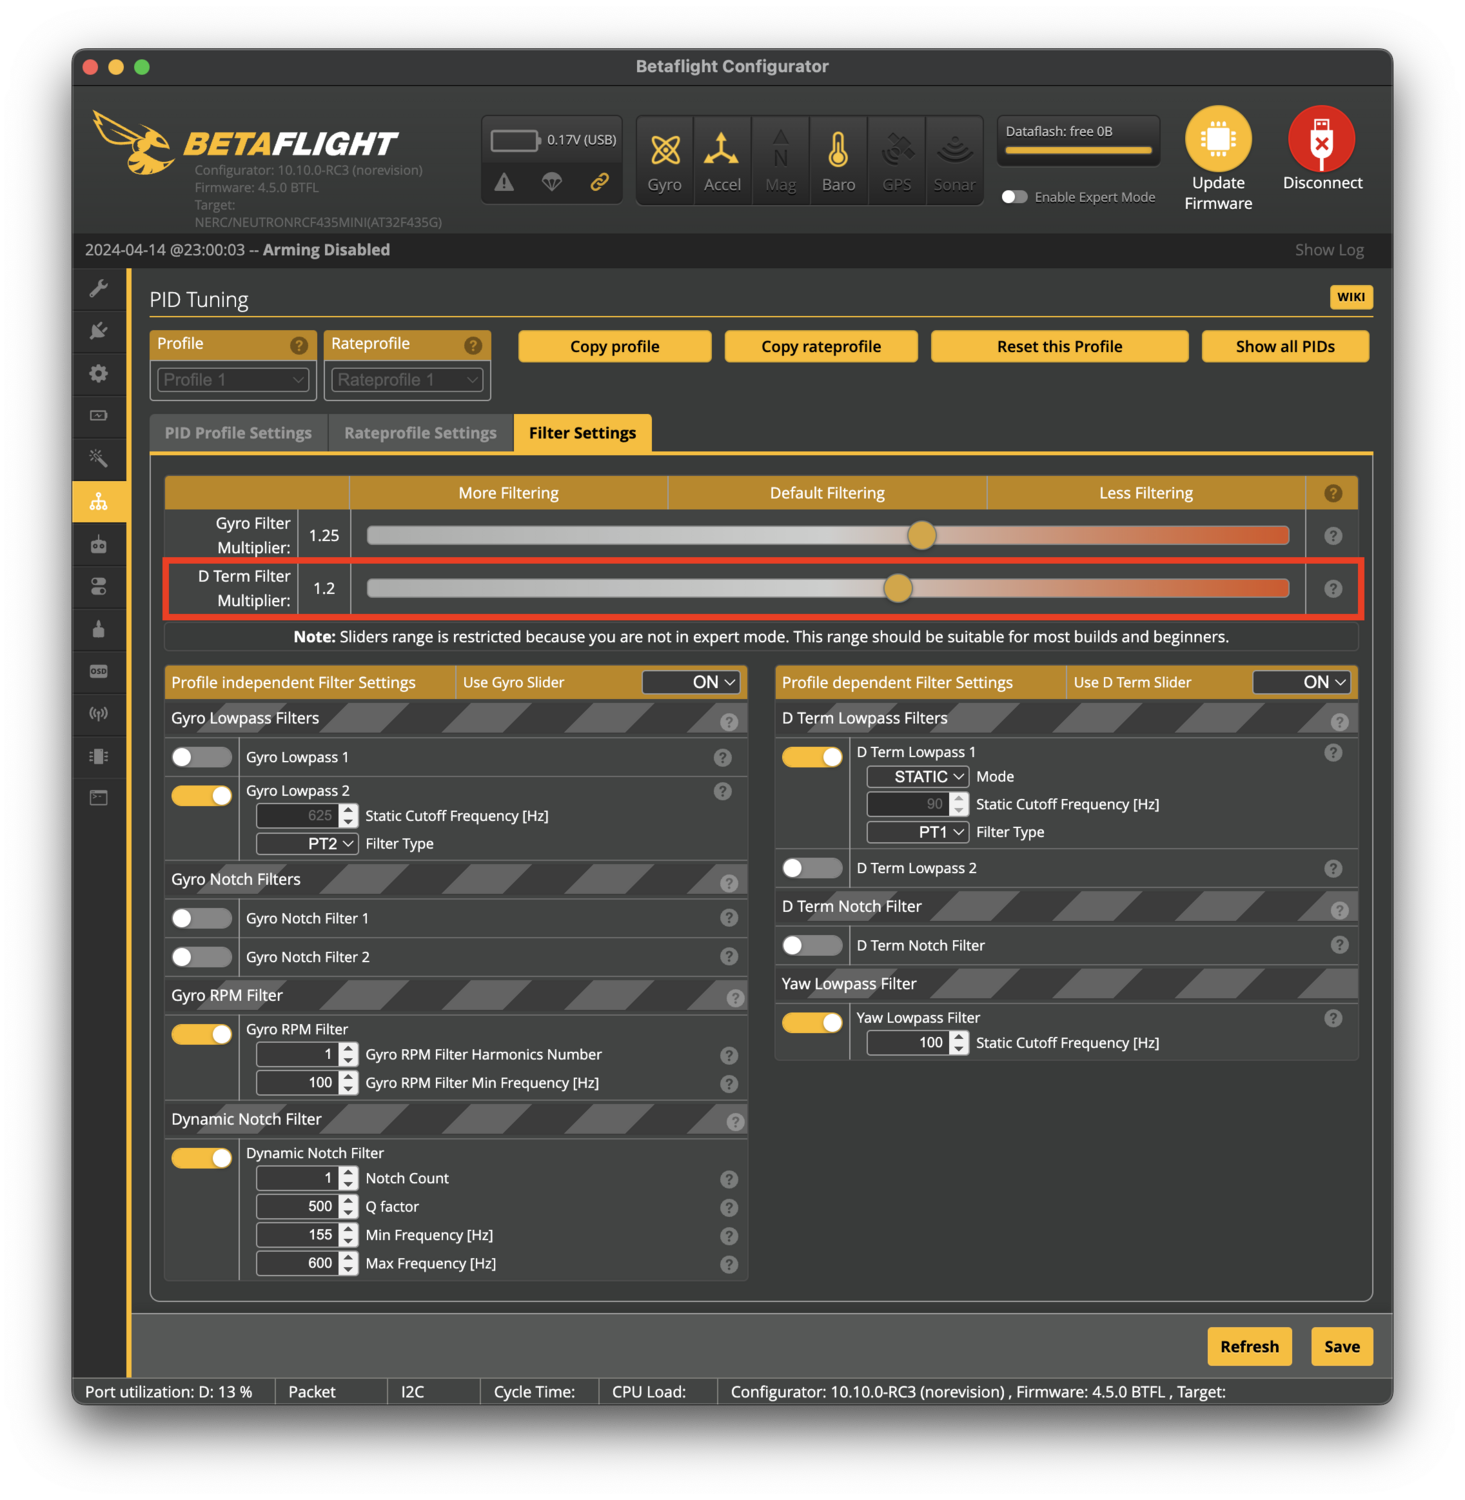
D Term Filter
 Click to enlarge
This one is pretty simple and does not require analyzing any plots.
All you need to do is to slightly increase the "D Term Filter Multiplier" slider until your motors become hot during flight or you hear oscillations.
When one of these happen, turn the slider back down a bit and you're done.